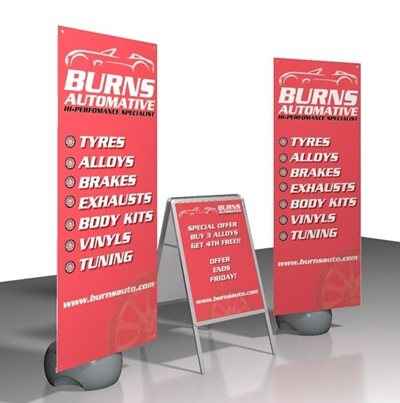
Outdoor Display Kit 1
£325.00
Ex VATIncludes a 10% saving!
- 2 x Blizzard Outdoor Banner Stands
- 1 x A-Board Pavement Sign (A1)

Description
Our Outdoor Display Kit 1 combines two of our top selling outdoor products. All our outdoor display products are specially designed for use outside and are weatherproof. Our blizzard banner stand is printed on our outdoor PVC material making it water resistant, and its plastic base can be weighted with either sand or water to help it survive moderate winds.
The simple eyelet system makes it easy to change the graphic and update your message. Our pavement sign is based around a simple snap frame, making it easy to change your display.
A1 Grpahics not included - contact us for pricing.
| x2 Blizzard Outdoor Banner Stands | A-Board Pavement Sign (A1) | |
|---|---|---|
| Assembled height | 2310mm | 1060mm |
| Assembled width | 800mm | 638mm |
| Assembled depth | 690mm | 825mm |
| Visual area height | 2000mm | 831mm |
| Visual area width | 800mm | 584mm |
| Image size height | 841mm | |
| Image size width | 594mm | |
| Weight | 7kgs | 11kgs |
Follow this simple guide to ensure your roller banner is printed perfectly.
Choose your specifications and place your order securely.
Download the specific templates from the list below.
We check resolution, bleed, and colour. We'll flag issues before printing.
Your graphics are produced and shipped.
Click to download the artwork template files for this product:
Pre-flight checks will be made on your artwork for quality and any issues will be raised before printing. Please be aware that it is your responsibility to check the accuracy of your artwork.
We ask for high resolution files to make sure your design is the best it can be, ideally in their native format. Download our artwork specification for full details.
If you don't have print ready work: Find out how we can help to design your perfect display. If you require additional assistance, please give our team a call.
This kit is great for outdoor events and exhibitions to attract attention to your stand. It is also perfect in any retail environment as either an indoor or outdoor display.
The graphics are incredibly easy to change perfect if you’re promoting multiple brands, products or offers.
Blizzard Outdoor Banner Stand:
See the instructional diagram here.
A-Board Pavement Sign:
1. Open out the A-sign frame to form a stable shape.
2. Push down on the central locking bars.
3. Open out the spring loaded frame sides.
4. Remove the clear protective sheet.
5. Place the graphic into the frame.
6. Re-fit the protective sheet and close the frame sides to secure (step 3 but reversed).
See instructional diagram here.